
How to Unclog a DTF Printer Printhead: Complete Step-by-Step Guide
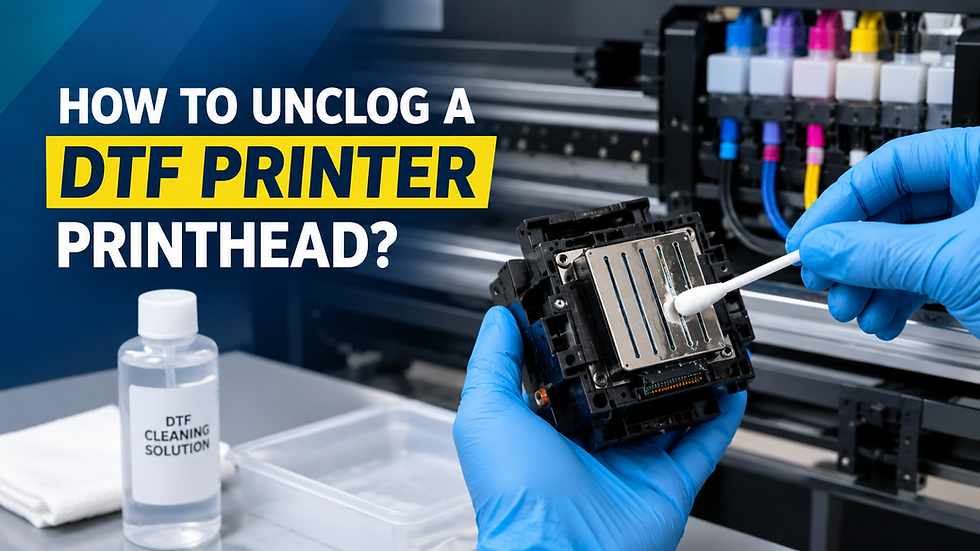
Quick answer: A clogged DTF printhead happens when dried ink, air bubbles, or dust block its microscopic nozzles. Fix it by running the printer's automated cleaning cycle first, then moving to manual printhead cleaning, a cleaning solution flush, or a 24 to 48 hour soak if the clog persists. This guide covers every step in order, plus how to prevent clogs from coming back.
Whether you run a Mimaki machine or an entry-level DTF printer, printhead clogs are one of the most common issues in DTF printing. Below, you'll find why clogs happen, how to spot them early, exactly how to clear them safely, and how to stop them from returning.
Why DTF Printheads Clog
DTF printers push ink through nozzles finer than a human hair. Three main causes trigger a clogged printhead:
Ink settling: White DTF ink contains heavy titanium dioxide particles. Left unused for just 2 to 3 days, these particles sink and solidify inside the nozzles.
Environmental exposure: Low humidity and high heat dry ink faster, both on the film and inside the printhead. Airborne dust also settles into the ink system.
Poor maintenance habits: Skipping cartridge agitation, mixing ink types without flushing lines, or skipping the printer's shutdown cycle introduces air bubbles and dried residue.
Knowing the cause helps you pick the right fix and stop repeating the same mistake.
Signs Your Printhead Is Clogged
Catch a printhead clog early and you save hours of downtime. Watch for:
Faded or dull colors on prints
Thin white lines or gaps running through the design
Patchy or streaky white ink coverage
A failed nozzle check pattern with missing lines
Run a nozzle check daily before production starts. It takes under a minute and tells you exactly which nozzles need attention.
How to Unclog a DTF Printhead: Step-by-Step
Step 1: Run the Automated Cleaning Cycle
Start here every time. Open your printer's software and find the Maintenance or Head Cleaning menu. Run it once, then print a nozzle check. If gaps remain, run it a second time. Avoid more than 2 to 3 cycles back to back. Excessive cleaning wastes ink and stresses the printhead.
Step 2: Manual Printhead Cleaning
If the automated cycle doesn't clear it, power off and unplug the printer, then:
Put on gloves and secure the ink cartridges so they don't leak.
Move the printhead to the center of the rail for easy access.
Dampen a lint-free cloth or foam swab with 75% to 90% isopropyl alcohol or a dedicated DTF cleaning solution.
Wipe the printhead exterior and capping station in one direction only. Scrubbing back and forth pushes debris deeper into the nozzles.
A dirty capping station is an overlooked clog cause. If it doesn't seal properly, air enters and dries out ink every time the printer sits idle.
Step 3: Deep Clean With Cleaning Solution
For a stubborn DTF ink clog, dip a foam swab in a warmed cleaning solution (35°C to 60°C works best) and gently work it around the nozzle plate edges. Let it sit for 5 to 10 minutes to soften hardened ink before wiping away.
Ink quality matters here too. Ink with inconsistent pigment dispersion clogs faster and demands more frequent deep cleaning. Many shops running Alpha Print Supply's Rustic United DTF Ink or STS Inks XPD2 report fewer clog cycles because the formulation is built for consistent daily production. If clogs are a constant fight, check whether your current ink supply is part of the problem.
Step 4: Soak Method for Stubborn Clogs
When wiping and cleaning solution don't restore flow, a soak is the next step:
Carefully detach the ribbon cables and remove the printhead from the housing.
Place a lint-free cloth in a flat tray and dampen it with a cleaning solution.
Rest the printhead nozzle-side down on the cloth and soak for 24 to 48 hours for hardened clogs.
Rinse gently with distilled water only. Tap water minerals can damage the nozzles.
Blot dry with a lint-free cloth before reinstalling.
This is an advanced technique. Work slowly on a grounded surface, and touch the printer's metal housing before handling components. Static discharge can destroy sensitive electronics in seconds.
Step 5: Reinstall and Test
Reinstall the printhead, power on, and run a cleaning cycle immediately using fresh ink to clear leftover cleaning solution from the lines. Follow with a nozzle check. If nozzles still show gaps, repeat Steps 2 through 4 before considering replacement.

Clog Causes and Fixes at a Glance
Cause | Best Fix | Time Needed |
Ink settling from idle time | Agitate ink, run cleaning cycle | Under 5 minutes |
Dried ink on nozzle plate | Manual wipe-down cleaning | 10 to 15 minutes |
Hardened internal clog | Cleaning solution deep clean | 15 to 30 minutes |
Severe, long-term buildup | Soak method | 24 to 48 hours |
Nozzles unresponsive after soak | Printhead replacement | Same day |
How to Prevent Printhead Clogs
Prevention costs far less than emergency repairs or a full printhead replacement. Build these habits into your daily routine:
Agitate white ink every morning before printing to keep particles suspended.
Never power down without letting the printer complete its parking and shutdown cycle. This seals the printhead and stops ink from drying.
Maintain 55% to 65% humidity near the printer using a small ultrasonic humidifier at the air intake.
Print daily, even a small test pattern, if the machine will sit unused for more than a day or two.
Flush the lines with a cleaning solution before any extended production pause.
If clogs are cutting into your deadlines during high-volume weeks, outsourcing overflow runs to a dedicated transfer printing service can keep orders moving while you handle maintenance without added pressure.
When to Replace the Printhead
Not every clog is fixable. If the soak method doesn't restore flow after 48 hours, or clogs return within days of a full clean, the internal channels are likely damaged beyond repair. At that point, printhead replacement is the only reliable fix. Running a damaged printhead longer usually costs more in wasted ink and film than the replacement part itself.
Closing Perspective: Keep Your DTF Printer Running, Not Guessing
A clogged DTF printhead doesn't have to mean lost production days. Work through the steps in order, start light with automated cycles, and only move to manual or soak methods when needed. Pair that with consistent daily maintenance and you'll cut clogs dramatically.
If clogs keep coming back no matter what you try, it might be your ink, your printer's condition, or your environment. Alpha Print Supply's team can help you diagnose the real cause and match you with the right consumables and equipment for reliable, clog-free production.
Explore our complete range of DTF equipment and premium printing supplies to support every stage of your business.
Frequently Asked Questions
How often should I clean my DTF printhead?
Run a nozzle check daily before starting production and a light cleaning cycle whenever you see gaps or streaks. Deep cleaning with solution is only needed when the automated cycle fails, typically every few weeks depending on usage.
Can I use regular isopropyl alcohol to clean a DTF printhead?
Yes, 75% to 90% isopropyl alcohol works well for wiping the exterior and capping station. Avoid using it for prolonged soaking, since a dedicated DTF cleaning solution is formulated specifically to dissolve DTF ink without damaging internal components.
Why does my DTF printer clog even when I use it regularly?
Frequent clogs usually point to low humidity, an unsealed capping station, or inconsistent ink quality. Check your environment first, then evaluate whether your current ink is prone to settling or pigment separation.
Is it safe to soak the entire printhead in water?
No. Only use distilled water for a light rinse after cleaning solution treatment, never as the primary soak. Tap water minerals and prolonged submersion can permanently damage the piezoelectric nozzles.
How do I know if I need a new printhead instead of cleaning? If nozzle checks still show missing lines after a full soak and reclean, or clogs return within days of resolving them, the internal channels are likely permanently blocked. At that point, replacement restores print quality faster than repeated cleaning attempts.


Comments